How to Design a Picnic Setup for a Photoshoot
To create a picnic setup that looks good in photos, focus on usability and clean design—not decoration. Start by selecting a flat, clean spot with even natural light. Lay down a sturdy blanket or rug to define the area and prevent shifting.
Add only what’s necessary: group food, props, and seating items with space between them so the setup doesn’t feel cluttered. Choose elements with matte textures and soft tones to avoid glare. Every item—whether it’s a plate, a drink, or a napkin—should have a clear place and purpose in the frame.
Avoid glossy materials, clashing colors, or crowded scenes. The setup should be easy to interact with, comfortable to sit in, and visually balanced when photographed from different angles.
Pick a Theme for Your Picnic Photoshoot and Stick to It
A clear visual theme keeps your setup from looking scattered. It also helps every part of the scene—from food to fabrics—work together visually in a single frame.
The goal isn’t to make everything match perfectly, but to create consistency that reads well on camera. Without a theme, your picnic can feel busy and directionless. With one, the layout becomes easier to style and easier to shoot.
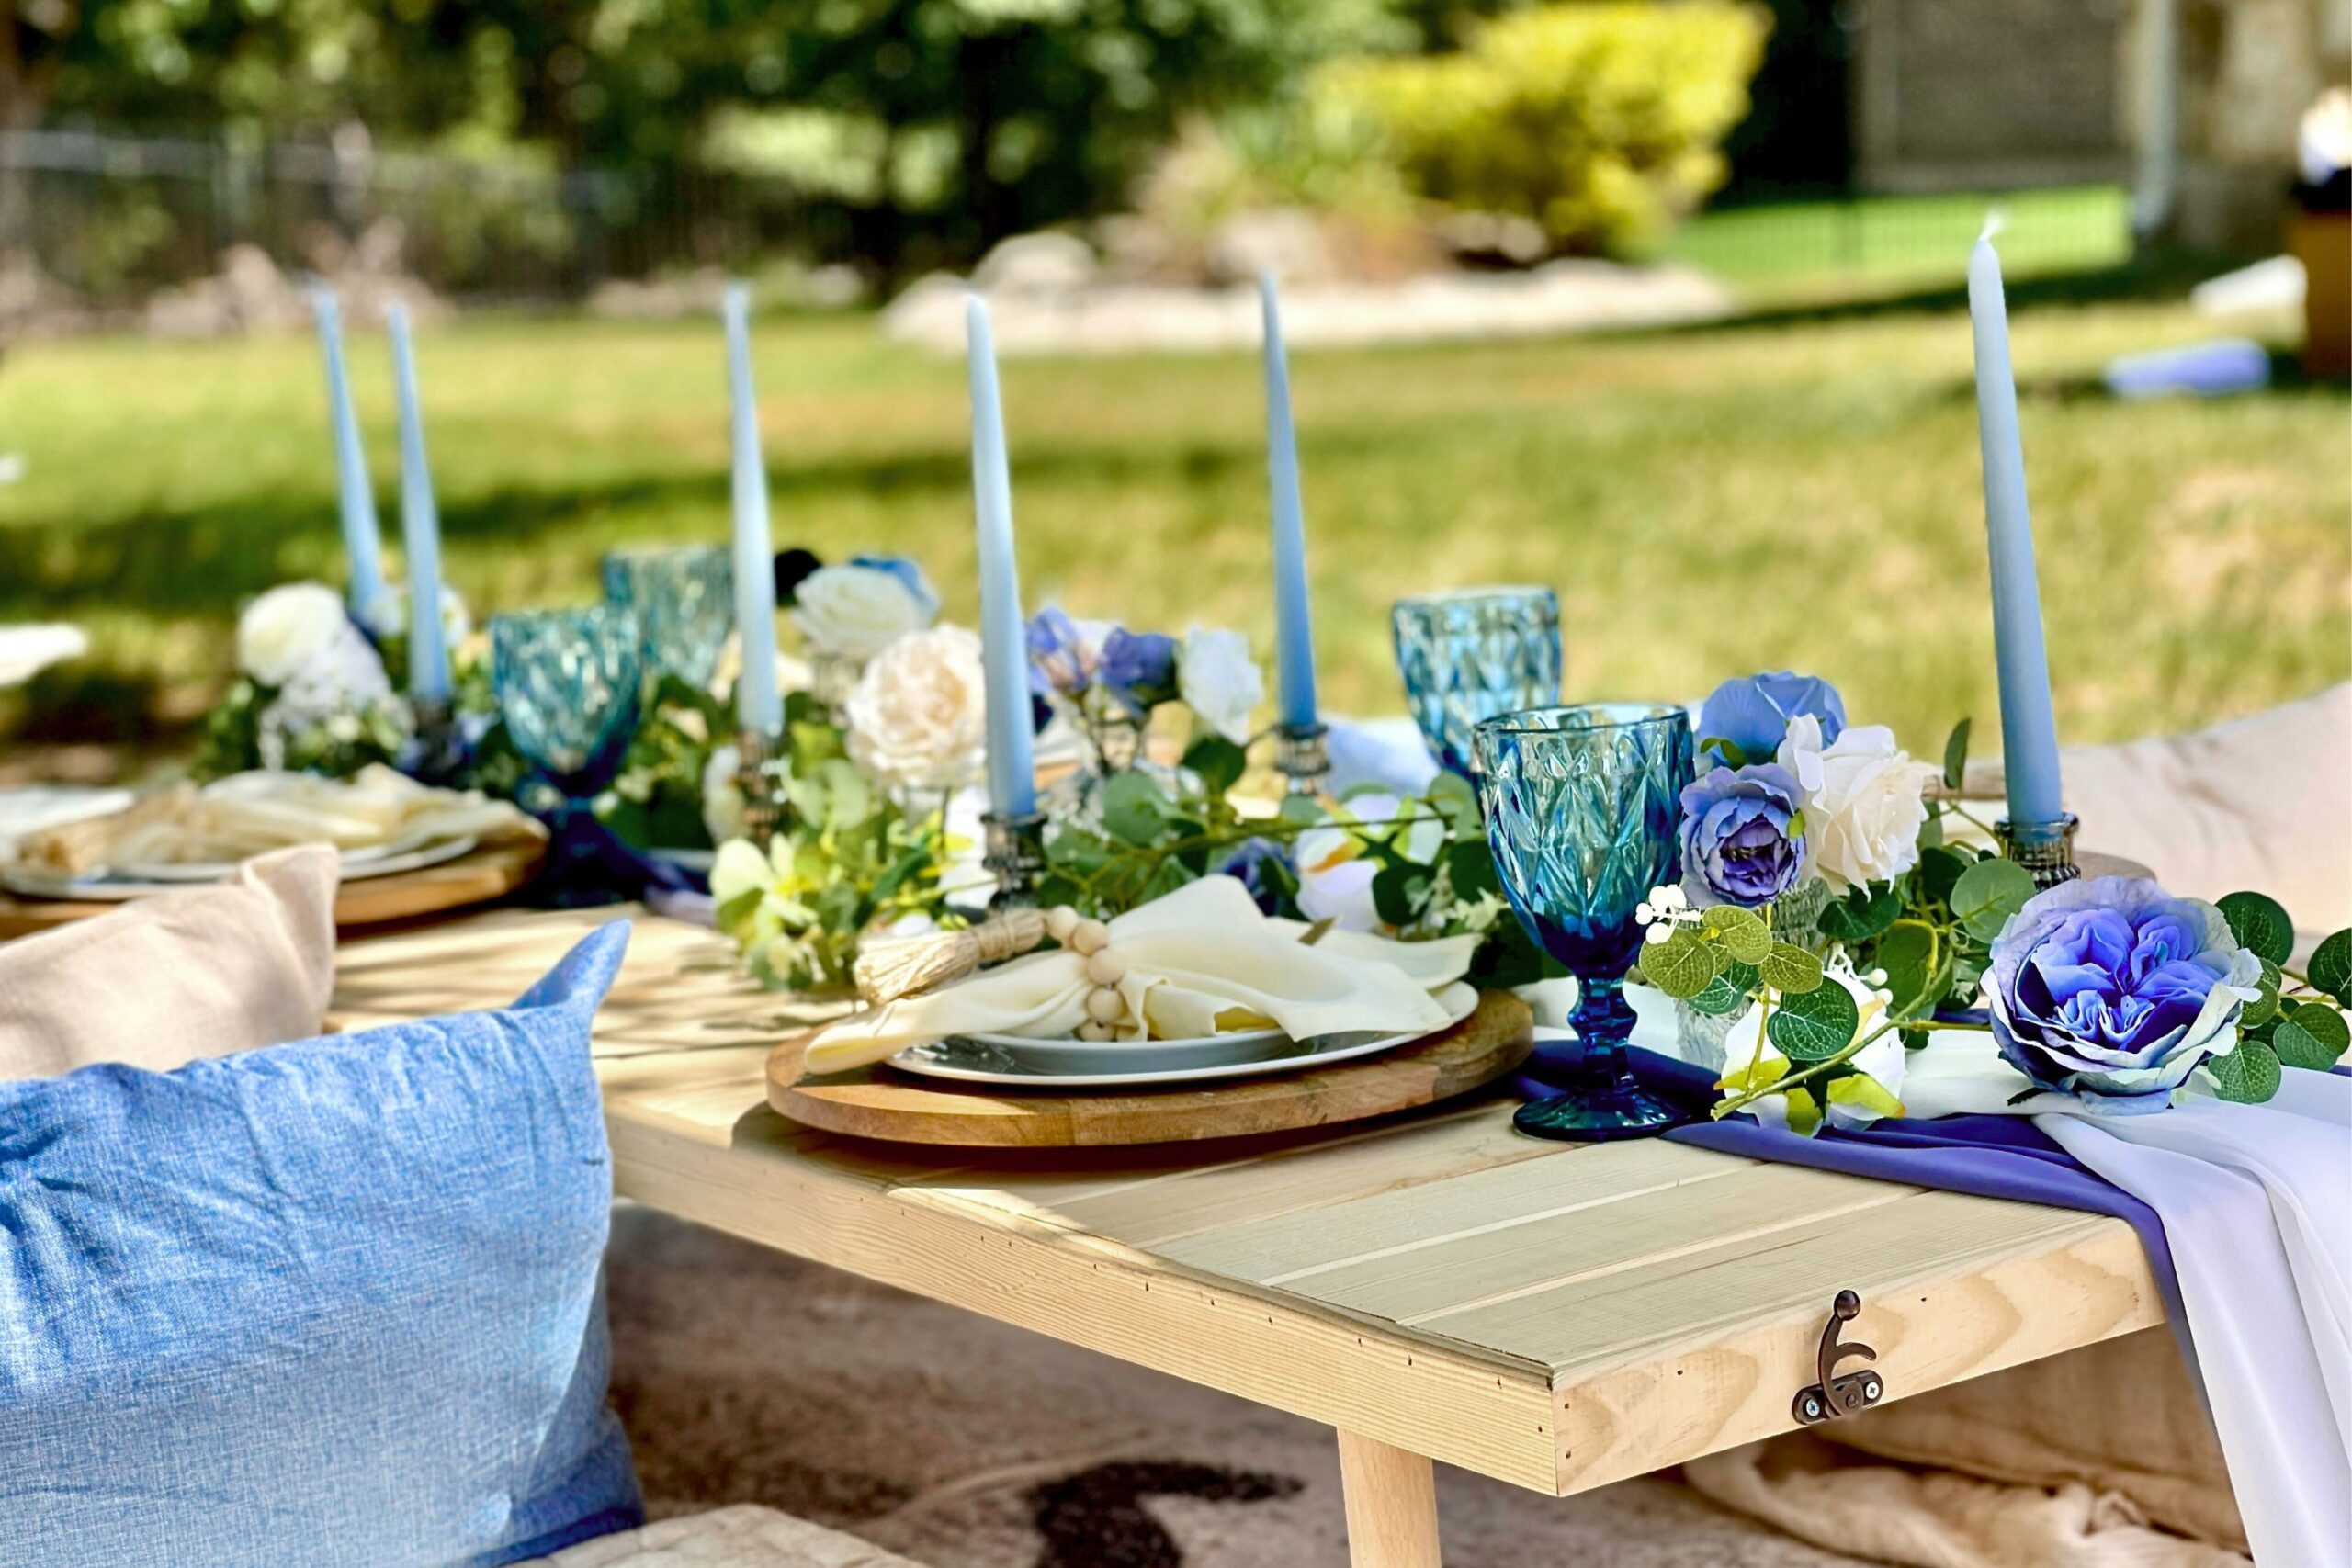
Choose two primary colors and a neutral
Pick a limited palette: two primary colors and one neutral to tie everything together. For example, sage and peach with beige, or mustard and navy with off-white.
Carry those colors through key elements—blankets, plates, napkins, florals, even food packaging or drink choices.
This builds cohesion without requiring every item to be identical. It also saves time when deciding what to include or exclude from the frame.
Keep textures matte and non-reflective
Matte finishes work best outdoors. Materials such as linen, raw cotton, bamboo, ceramic, and glass help control glare and prevent unwanted reflections in direct sunlight. Skip foil wrappers, shiny plastics, and anything with large logos.
These pull attention away from the scene and can throw off the lighting. Stick to soft finishes with natural texture—they add visual warmth and photograph consistently in changing light.
Build a Functional, Photo-Friendly Layout
Your picnic setup should look stylish yet still be usable. Too many props can make the scene look staged. Too little structure, and the image can feel flat.
The best layouts create a natural flow—with clear zones for sitting, serving, and decoration—while leaving enough negative space to highlight key details.
The camera should be able to “read” the layout in a single glance.
Layer your base for structure and comfort
Start with a thick, textured base layer, such as a woven cotton rug or a sturdy picnic blanket. This adds stability on uneven surfaces and prevents sagging. Layer a lighter throw on top at an angle or off-center.
It visually separates lounging space from your central layout—helping define areas for food, seating, or props.
Layering also adds subtle shadows and depth, which makes your image feel more dimensional when shot from above.
Create a focal point and balance the space
Choose one main object to anchor the setup: a crate, a floral arrangement, or a large board with snacks. This central item should sit low and wide to ground the frame. Around it, arrange smaller items in groups, such as glasses, bowls, or cloth napkins.
Keep taller objects, such as bottles or jars, near the back or along one edge to prevent blocking the view.
Step back and check if your scene feels lopsided or too dense in one corner. If it does, shift objects to rebalance before shooting.
Choose Food That Looks Good on Camera
Not all picnic food photographs well. You want items that hold shape, offer natural color contrast, and won’t wilt in the sun. Avoid anything that leaks, melts, or requires utensils unless you’re staging action shots.
Go for ingredients that are compact, recognizable, and easy to group.
Use ingredients with shape and contrast
Bright fruits, such as sliced oranges, strawberries, grapes, and kiwi slices, offer clean edges and vibrant colors.
Triangle-cut sandwiches, round cookies, and individual pastries also photograph well—they stay structured, even after handling.
Choose ingredients that reflect your color theme. For example, red berries can evoke a wine-colored blanket, or peach slices can complement warm-toned napkins.
Group food by type or tone
Instead of spreading everything out evenly, cluster similar items to create visual focus. One board with fruit, another with bread or pastries.
Keep each group intentional and straightforward. Use wood or ceramic plates to ground the food and match your texture choices.
Wipe jars, cutlery, and board edges just before shooting to remove crumbs, smudges, or fingerprints. If you’re including drinks, fill them below the rim to avoid spills and light flare.
Use Light That Works in Real Life
Lighting defines the entire look of your picnic photo. The wrong light can flatten color, cast shadows across your setup, or create glare on glass and metal.
The right light adds shape, softness, and even warmth to every surface. You don’t need studio gear—just a good sense of timing and a few minor adjustments.
Shoot during golden hour
For soft, even light, aim to shoot within an hour after sunrise or an hour before sunset. During golden hour, shadows are longer and smoother, colors appear warmer, and everything feels more natural.
If you can’t shoot during these times, look for light cloud cover or shoot in partial shade. Midday sun is harsh and unpredictable—best avoided unless diffused.
Control glare and shadows with minor adjustments
Use a white cloth, linen umbrella, or sheer scarf to filter direct sunlight if needed. Rotate reflective objects, such as cutlery or bottles, slightly off-angle to avoid bounce-back. If shadows fall across the focal point, either move the item or reposition the layout slightly.
Always check how the light behaves through your camera or phone screen—not just with your eyes.
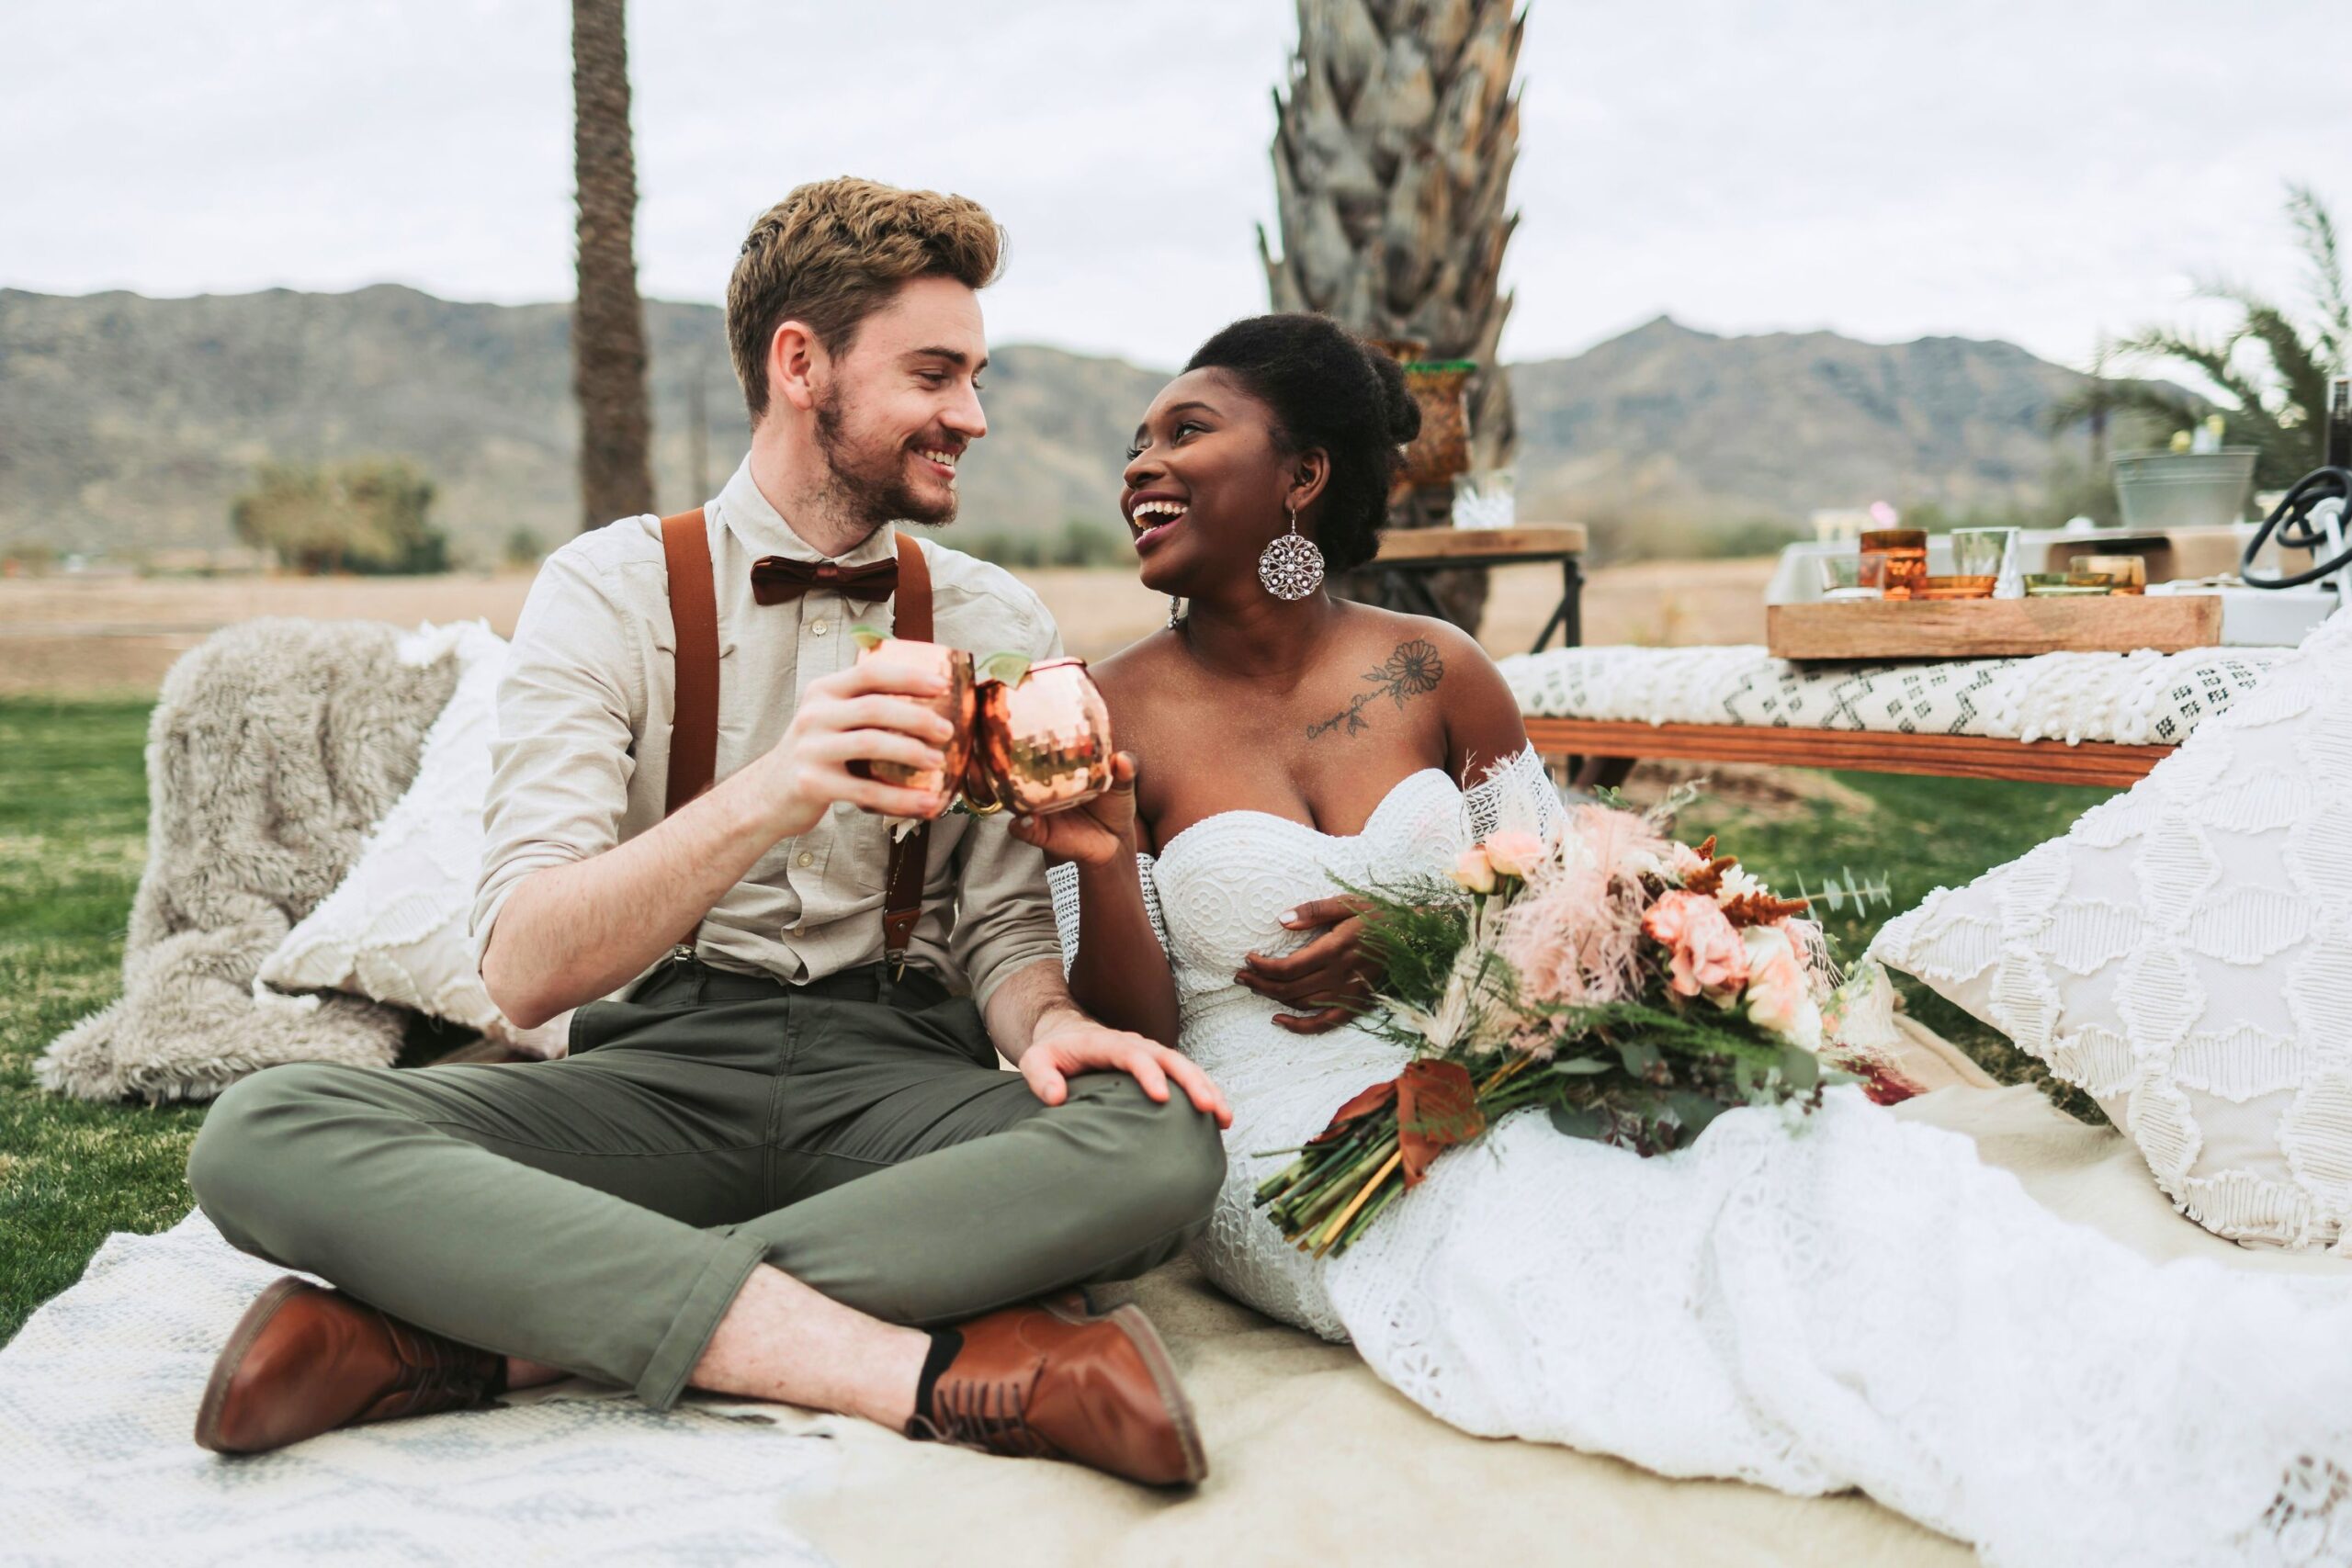
Plan for People in the Frame
When photographing guests or models in the picnic setup, design the layout with both movement and comfort in mind.
Make sure there’s enough room to sit without displacing props. Avoid placing anything breakable or top-heavy where it might get bumped.
Keep a cushion or an open spot ready so someone can easily join the scene without having to rearrange things.
Coordinate outfits with the picnic’s visual theme. Stick with solid colors or subtle patterns. Earth tones, light fabrics, and soft cotton or linen look clean in natural light and don’t distract from the setup.
Avoid logos, loud graphics, or overly reflective fabrics.
If people are sitting, have them turn slightly rather than face the camera straight on—it looks more relaxed and flatters posture in candid shots.
Match Your Tableware to the Setting
In outdoor photography, even minor color mismatches are more noticeable than they are indoors. Bright plates, printed napkins, or plastic cutlery can easily clash with natural surroundings. Stick with tableware that blends into the background or complements your chosen palette.
Ceramic plates, bamboo utensils, wooden boards, and fabric napkins in soft, neutral tones work best. They reduce glare and bring texture to the frame.
Use one or two types of glassware—mismatched cups can pull focus. Even if you’re using everyday items, keep the tones close together. Clear glass, muted clay, or unfinished wood all read well in photos.
Avoid glossy finishes and highly saturated colors unless they’re part of your defined theme.
When in doubt, subtract. A clean layout with just the basics often photographs better than one filled with props that compete for attention.
Pack for Easy Setup and Reset
How you pack matters just as much as how you style. A well-organized setup allows you to work faster and adjust quickly if the lighting changes or something gets knocked out of place.
Group soft items, such as blankets, towels, and throws, in one bag, and store harder items—like boards, jars, and trays—in a separate crate.
Keep food in tightly sealed containers, pre-arranged where possible, and bring them out only when you’re ready to shoot.
Carry a small utility pouch with essentials you’ll need on-site: a cloth towel, wipes, scissors, tape, a trash bag, and a few clips or string to secure loose items in the wind.
If you’re using a tripod or shooting with multiple angles, pack it in a location where it’s easy to access.
Having a reset plan saves time and prevents you from losing momentum when light conditions change or a setup is disrupted.
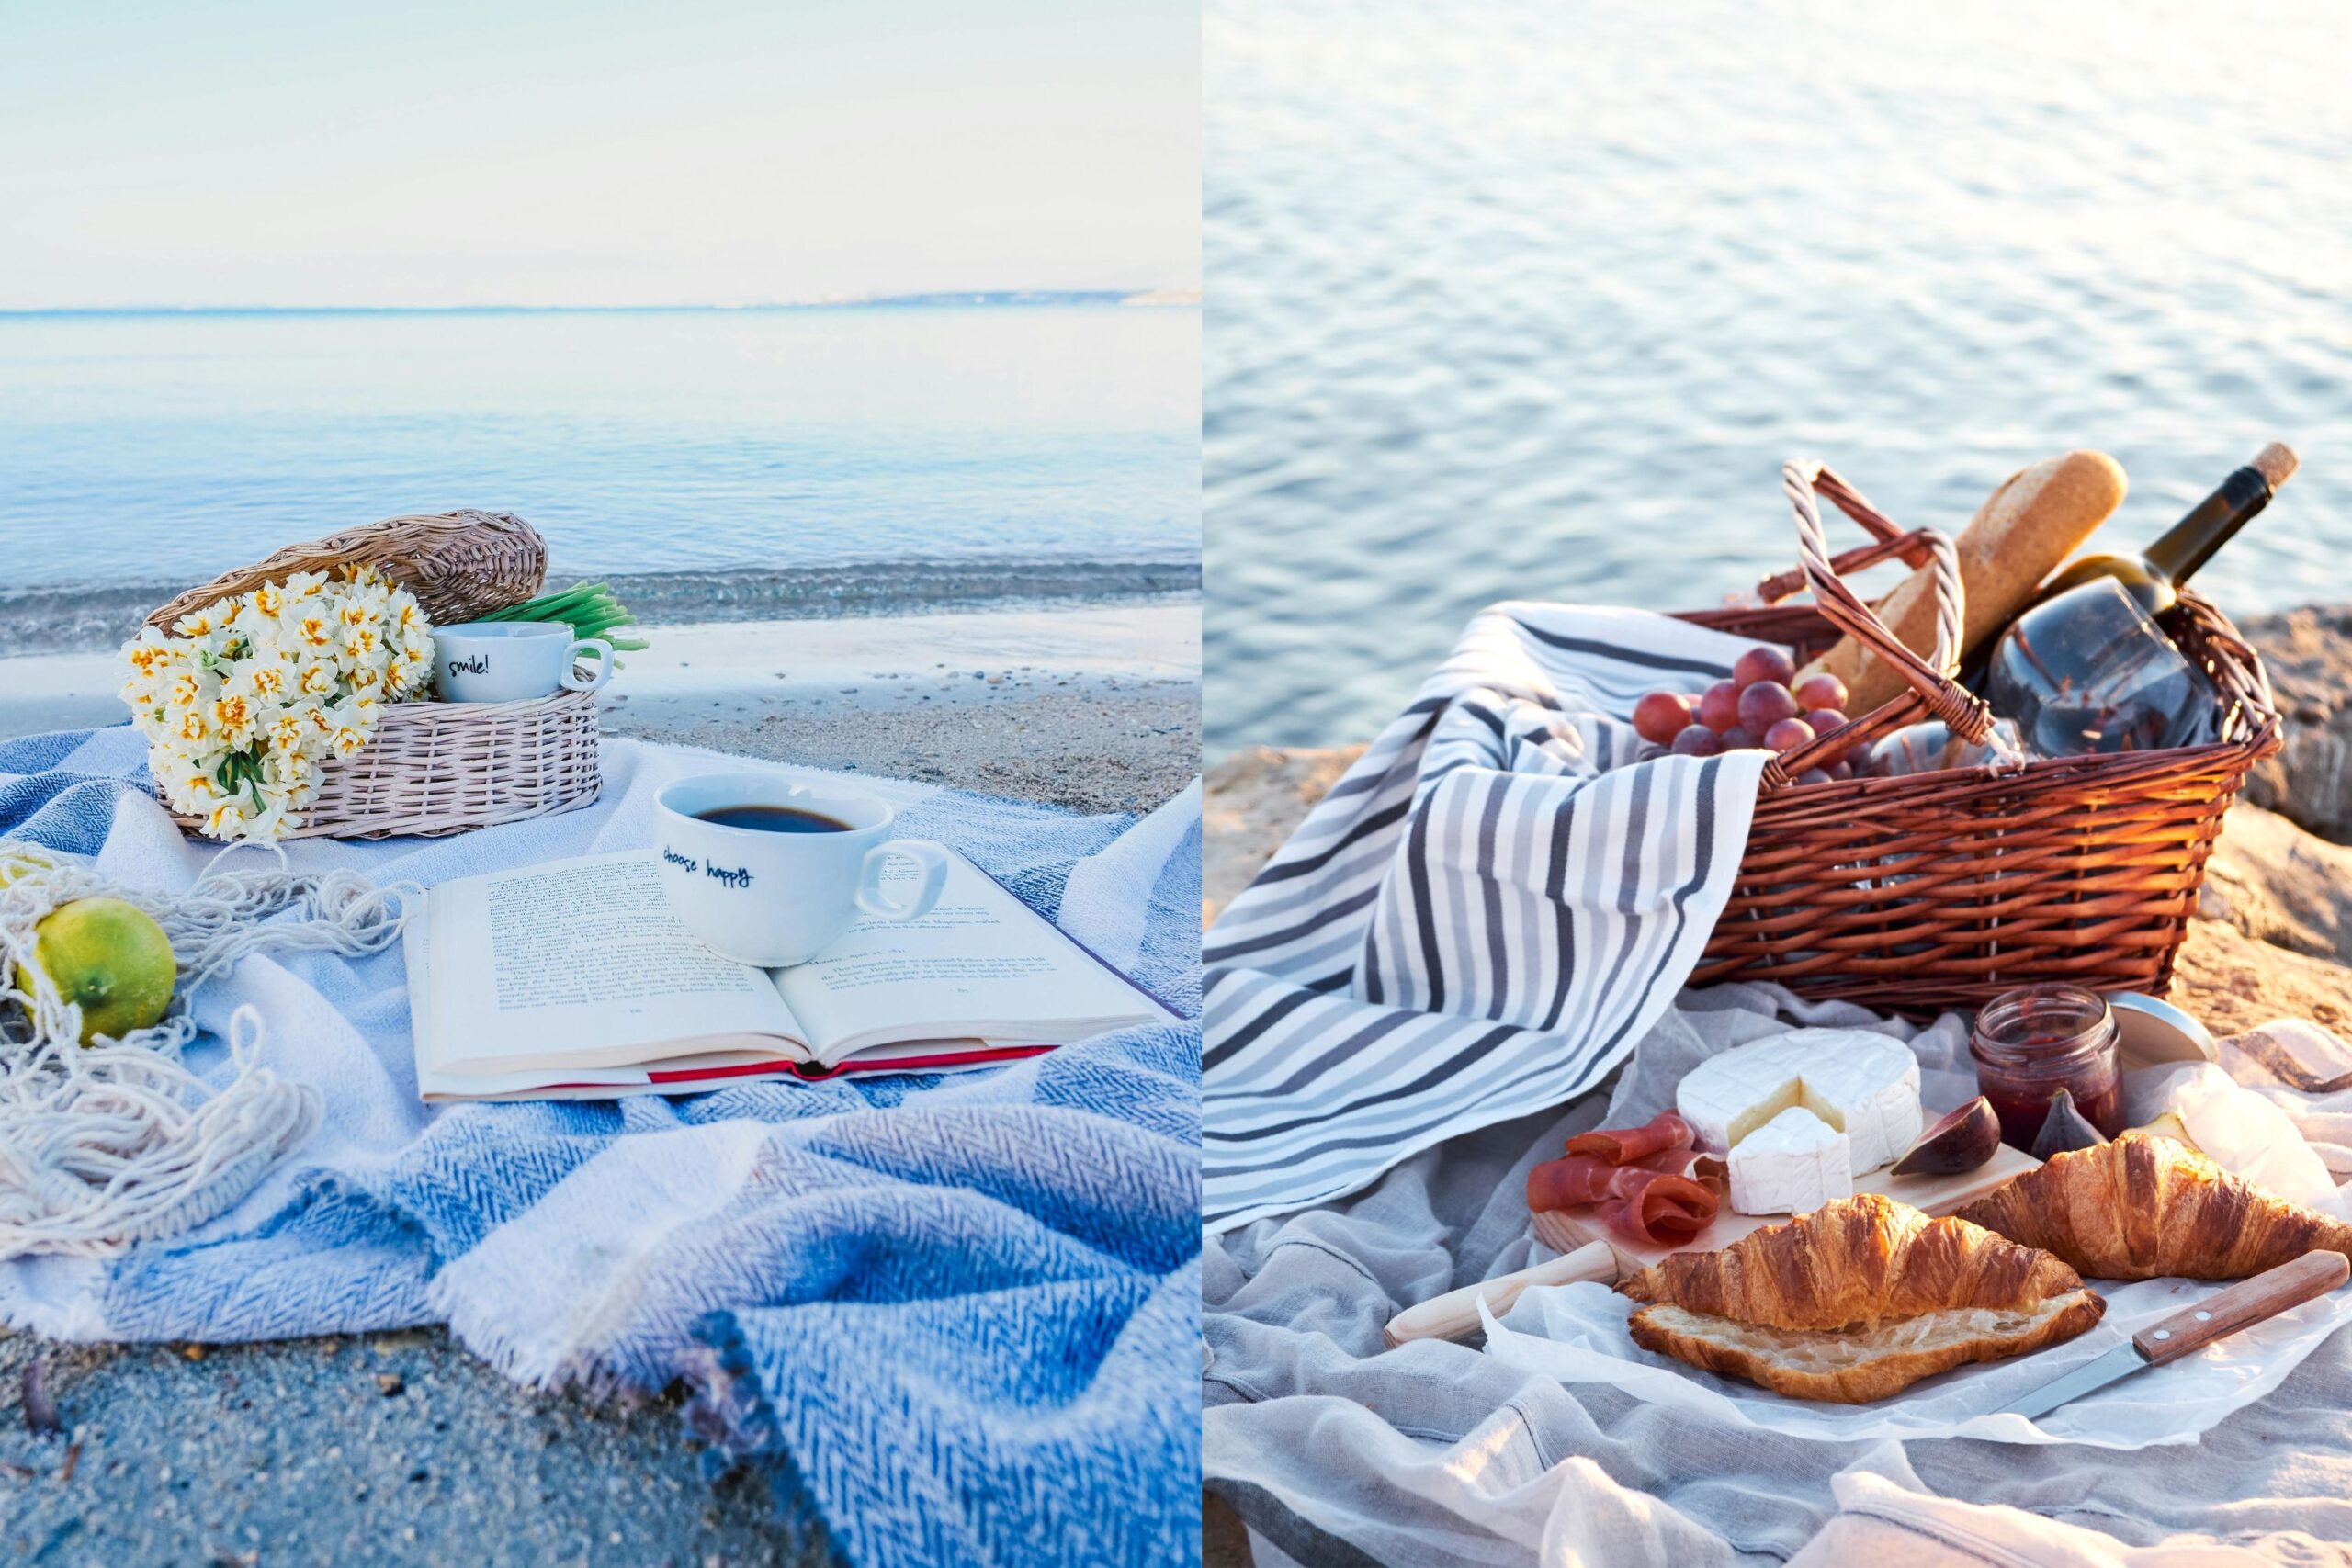
Include One Personal Element That Feels Real
One small personal item can make a picnic setup feel like it belongs to someone, not a showroom. A worn book, a notebook with handwriting, sunglasses, or even a bag that’s been casually set aside adds context to the scene.
Select an item that complements the overall color palette and doesn’t clash with the surrounding textures. Avoid anything with prominent branding or labels unless you plan to hide them.
Place it naturally—lean a book slightly open, or let a napkin hang just over the edge of a crate.
These lived-in details help the photo feel authentic, not staged.
Arrange the Layout for Multiple Camera Angles
Design your setup so that it looks balanced, whether you’re shooting from above, at eye level, or from the side.
Use the back area of the blanket for taller items—like a bottle, bouquet, or stack of plates—and keep shorter, flatter elements like food and utensils near the front.
Check how the setup looks from all sides before you shoot. It should feel stable and logical from each angle. If one side is heavier, balance it with an opposite visual anchor, such as a cushion, basket, or extra plate.
This saves time adjusting between shots and gives you more usable frames.
Use Repetition to Create Visual Structure
Repeating one or two elements adds rhythm to the layout without making it feel symmetrical or rigid. For example, use identical jars for drinks on opposite ends, or the same napkin under each food board.
This technique works exceptionally well in flat lays and side shots—it makes the layout feel intentional. Choose simple, neutral items that support your color palette.
Repetition is beneficial when working with minimal props, as it helps tie the scene together.
Keep the Edges of the Frame Clean
Visual clutter at the edge of the frame distracts from your main scene. Remove all unnecessary items around the blanket, such as bags, shoes, wrappers, and unused props, before shooting.
Keep at least 1–2 inches of visible space between the edge of the blanket and the first large object. That small margin creates separation and keeps the layout from feeling crowded in photos.
Always double-check through your phone or camera to catch items that might sneak into the shot from unexpected angles.
Plan for Wind, Heat, and Uneven Surfaces
Outdoor conditions can disrupt your setup fast. Bring clothespins, string, or clips to hold down throws or paper items in case of wind. Use double-sided tape under lightweight items to keep them in place.
Place heavier props like baskets or jars at the corners of your blanket to prevent shifting. Avoid stacking fragile items—especially glassware—on uneven ground.
If the surface is soft (like sand or grass), place a board or tray under food to create a stable base. Pack a towel or paper napkins for quick cleanups if things tip or spill.
Use One Statement Piece to Anchor the Scene
Too many props compete for attention. Instead, choose one standout item to center the setup—a floral arrangement, a vintage picnic basket, or a distinctive tray. This becomes the visual anchor that helps define your composition.
Keep the rest of the layout simple and in balance with your focal piece. If your main item has intense color or shape, use soft tones around it to avoid overpowering the frame.
One well-placed item is easier to photograph than three competing ones.
Group Items by Function, Not Just Aesthetics
Organizing your layout by purpose helps it feel more natural and usable. Keep all food in one zone, drinks in another, and accessories like napkins or glasses together nearby.
This makes the setup more straightforward to navigate and photograph in close-up shots.
Avoid scattering items without a plan—it may look random, not relaxed. Think of your layout in sections: one area for eating, one for sitting, one for display.
Pay Attention to Shadows in Your Frame
Strong sunlight creates hard shadows that can make your setup look uneven or distracting. Look for natural shade or bring a light-colored cloth or umbrella to soften harsh light.
Before you shoot, preview the setup through your camera and observe how the shadows fall across key items, such as food, jars, or cushions.
If you see strong lines or patchy lighting, shift the layout slightly or rotate objects to even things out.
Use Everyday Items That Photograph Well
You don’t need special props—just choose everyday items that translate well in photos. Woven baskets, plain ceramic mugs, or linen towels are more suitable than bright plastic or disposable tableware.
Stick to neutral colors and avoid shiny finishes. Items with a bit of texture—such as wooden boards or glass jars—add visual interest without needing additional decoration. When in doubt, fewer high-quality basics are better than many cheap extras.
Test the Layout with a Quick Photo Before You Start
Before you finalize the setup, take a test photo from the angle you plan to shoot. You’ll often notice details through the camera that you wouldn’t catch by eye—like awkward spacing, uneven balance, or distracting elements near the edges.
Use this preview to shift objects, fix lighting, or remove anything unnecessary. It saves editing time later and helps you get cleaner, more usable frames from the start.
Match the Picnic Setup to the Purpose of the Photoshoot
Think about why you’re shooting the picnic before you choose your layout. A relaxed birthday scene calls for soft textures, sweet foods, and a few celebratory details.
A brand shoot may need consistent color use, clean surfaces, and product placement
Let the setup reflect the tone of the shoot. If the focus is lifestyle content, lean into comfort and lived-in elements. If it’s for a product or service, keep background distractions to a minimum and center the item.
Align your setup with your purpose and you will make the scene feel deliberate and relevant.
Add Height Variation for Depth in the Shot
A flat scene feels lifeless in photos. Use items of different heights to create layers and visual depth. Bottles, floral jars, and folded blankets add vertical interest, while trays and plates keep the lower level grounded.
Too much height can block the frame, but just enough contrast helps the eye move through the image. Place taller items toward the back and shorter pieces in front.
You can also stack books or cutting boards under plates to raise them slightly without adding more clutter.
Keep Food Portions Small and Tidy
Large amounts of food tend to look messy or overwhelm the frame. Stick to smaller servings—three cookies, a few slices of fruit, or one mini sandwich per plate. This creates structure and keeps the layout looking clean.
Use neutral-colored boards or plates to group items. Avoid piling food high, and wipe edges or crumbs before shooting. Keeping food portions small makes your layout easier to adjust and photograph from different angles.
Think About How the Setup Will Be Used
Even if the shoot is styled, the setup should still be usable. Leave space for someone to sit, set down a drink, or reach for food without disrupting the layout. Don’t block all open areas with props—use only what you need.
A usable layout helps models, guests, or influencers interact with the space naturally. The result is more believable and lends itself to better candid shots, even if the final image is still carefully composed.
Bring Backup Items for Quick Fixes
Outdoor shoots rarely go as planned. A second throw blanket, a backup napkin, or an extra glass can save a shot if something gets stained, tipped over, or broken.
Pack a small bag with useful extras: tape, scissors, safety pins, paper towels, and wet wipes.
Having backup items nearby helps you adjust quickly without having to dismantle the entire setup. It also provides flexibility if you want to change the look mid-shoot without having to start from scratch.
Use Neutral Backdrops to Keep Focus on the Setup
The setting around your picnic should support the scene, not distract from it. Avoid backgrounds with busy signage, parked cars, or unrelated crowds. Open grass, sand, stone paths, or neutral tree lines work best.
If the background is busy but the location is non-negotiable, consider repositioning for a tighter shot or shooting at a lower angle.
You can also use props like open baskets, blankets, or taller florals to block or soften what’s behind the main setup.
Choose Drinkware That’s Practical and Photogenic
Glass jars, stemless wine glasses, or sturdy tumblers all work well outdoors and look clean in photos. Avoid cups that are too tall or light—they tip easily and can look awkward on uneven surfaces.
Stick to one type of glass to keep visual consistency. If your drinks are light-colored, use clear containers to maintain their clarity.
For darker beverages or infused water, matte bottles or ceramic mugs can help balance brightness in the frame.
Avoid Overcrowding with Too Many Small Props
More doesn’t mean better. Too many small items can make your layout look scattered and unfocused. Pick 5–7 key elements that serve a purpose—food trays, picnic drinks, a floral jar, a picnic basket, and maybe one or two textiles.
Space these intentionally with enough breathing room around each. If something doesn’t add to the scene or serve a function, remove it. Clean layout beats decorative overload in almost every picnic photo.
Coordinate Clothing if People Are in the Frame
If the photoshoot features people, their picnic outfits should complement the setup. Stick to colors that match the blanket and food tones—nothing neon, no loud graphics. Choose simple fabrics like cotton or linen that look good sitting, bending, or reaching.
Avoid reflective sunglasses, hats with logos, or accessories that don’t fit the theme. Everyone doesn’t need to match, but the colors should feel like they belong in the same scene.
Use Hands or Movement to Add Life to the Scene
Even a still picnic setup can benefit from subtle motion. A hand pouring a drink, reaching for a piece of fruit, or straightening a napkin adds life without distracting from the layout.
Use these moments to capture more natural images. Have one person sit slightly off-center or angle a prop mid-use. These small gestures help break the stiffness and create storytelling without needing dramatic poses or artificial props.
Checklist: What to Bring for a Picnic Photoshoot
| Element | What to Use | Why It Works |
| Base Layers | Thick cotton blanket + lightweight throw | Creates texture, defines space, stays in place on uneven ground |
| Color Theme | Two main colors + one neutral (e.g., sage, blush, beige) | Keeps layout cohesive and avoids visual clutter |
| Focal Item | One standout object (basket, floral jar, vintage tray) | Anchors the scene and adds interest without distraction |
| Props | 5–7 max (crates, jars, napkins, pillows) | Prevents overcrowding and makes photos cleaner |
| Food | Small portions of structured items (berries, croissants, citrus) | Adds color and shape without mess or melting |
| Drinkware | Matching jars, tumblers, or mugs | Looks consistent and won’t tip over outdoors |
| Height Variation | Bottles, jars, stacked plates, crates | Adds visual depth and improves composition |
| Repetition | Duplicate napkins, matching plates, or grouped items | Creates rhythm and visual flow |
| Lighting Tools | White cloth, cotton umbrella, or natural shade | Controls harsh shadows and highlights |
| Setup Check | Quick test photo from all angles before shooting | Helps adjust framing, lighting, and item placement early |
| Backup Items | Extra throw, wipes, clips, scissors, tape | Allows fast recovery if anything shifts, stains, or breaks |
FAQs
How can I make the picnic look stylish yet still authentic?
Use a few well-placed items and leave space between them. Choose natural materials, add a personal detail like a book or hat, and avoid cluttering the layout. The setup should be such that someone can sit and enjoy it.
What should I avoid when planning the setup?
Avoid shiny materials, too many clashing colors, or overly staged props. Skip foods that melt, leak, or crumble. Keep the setup clean, practical, and visually consistent.
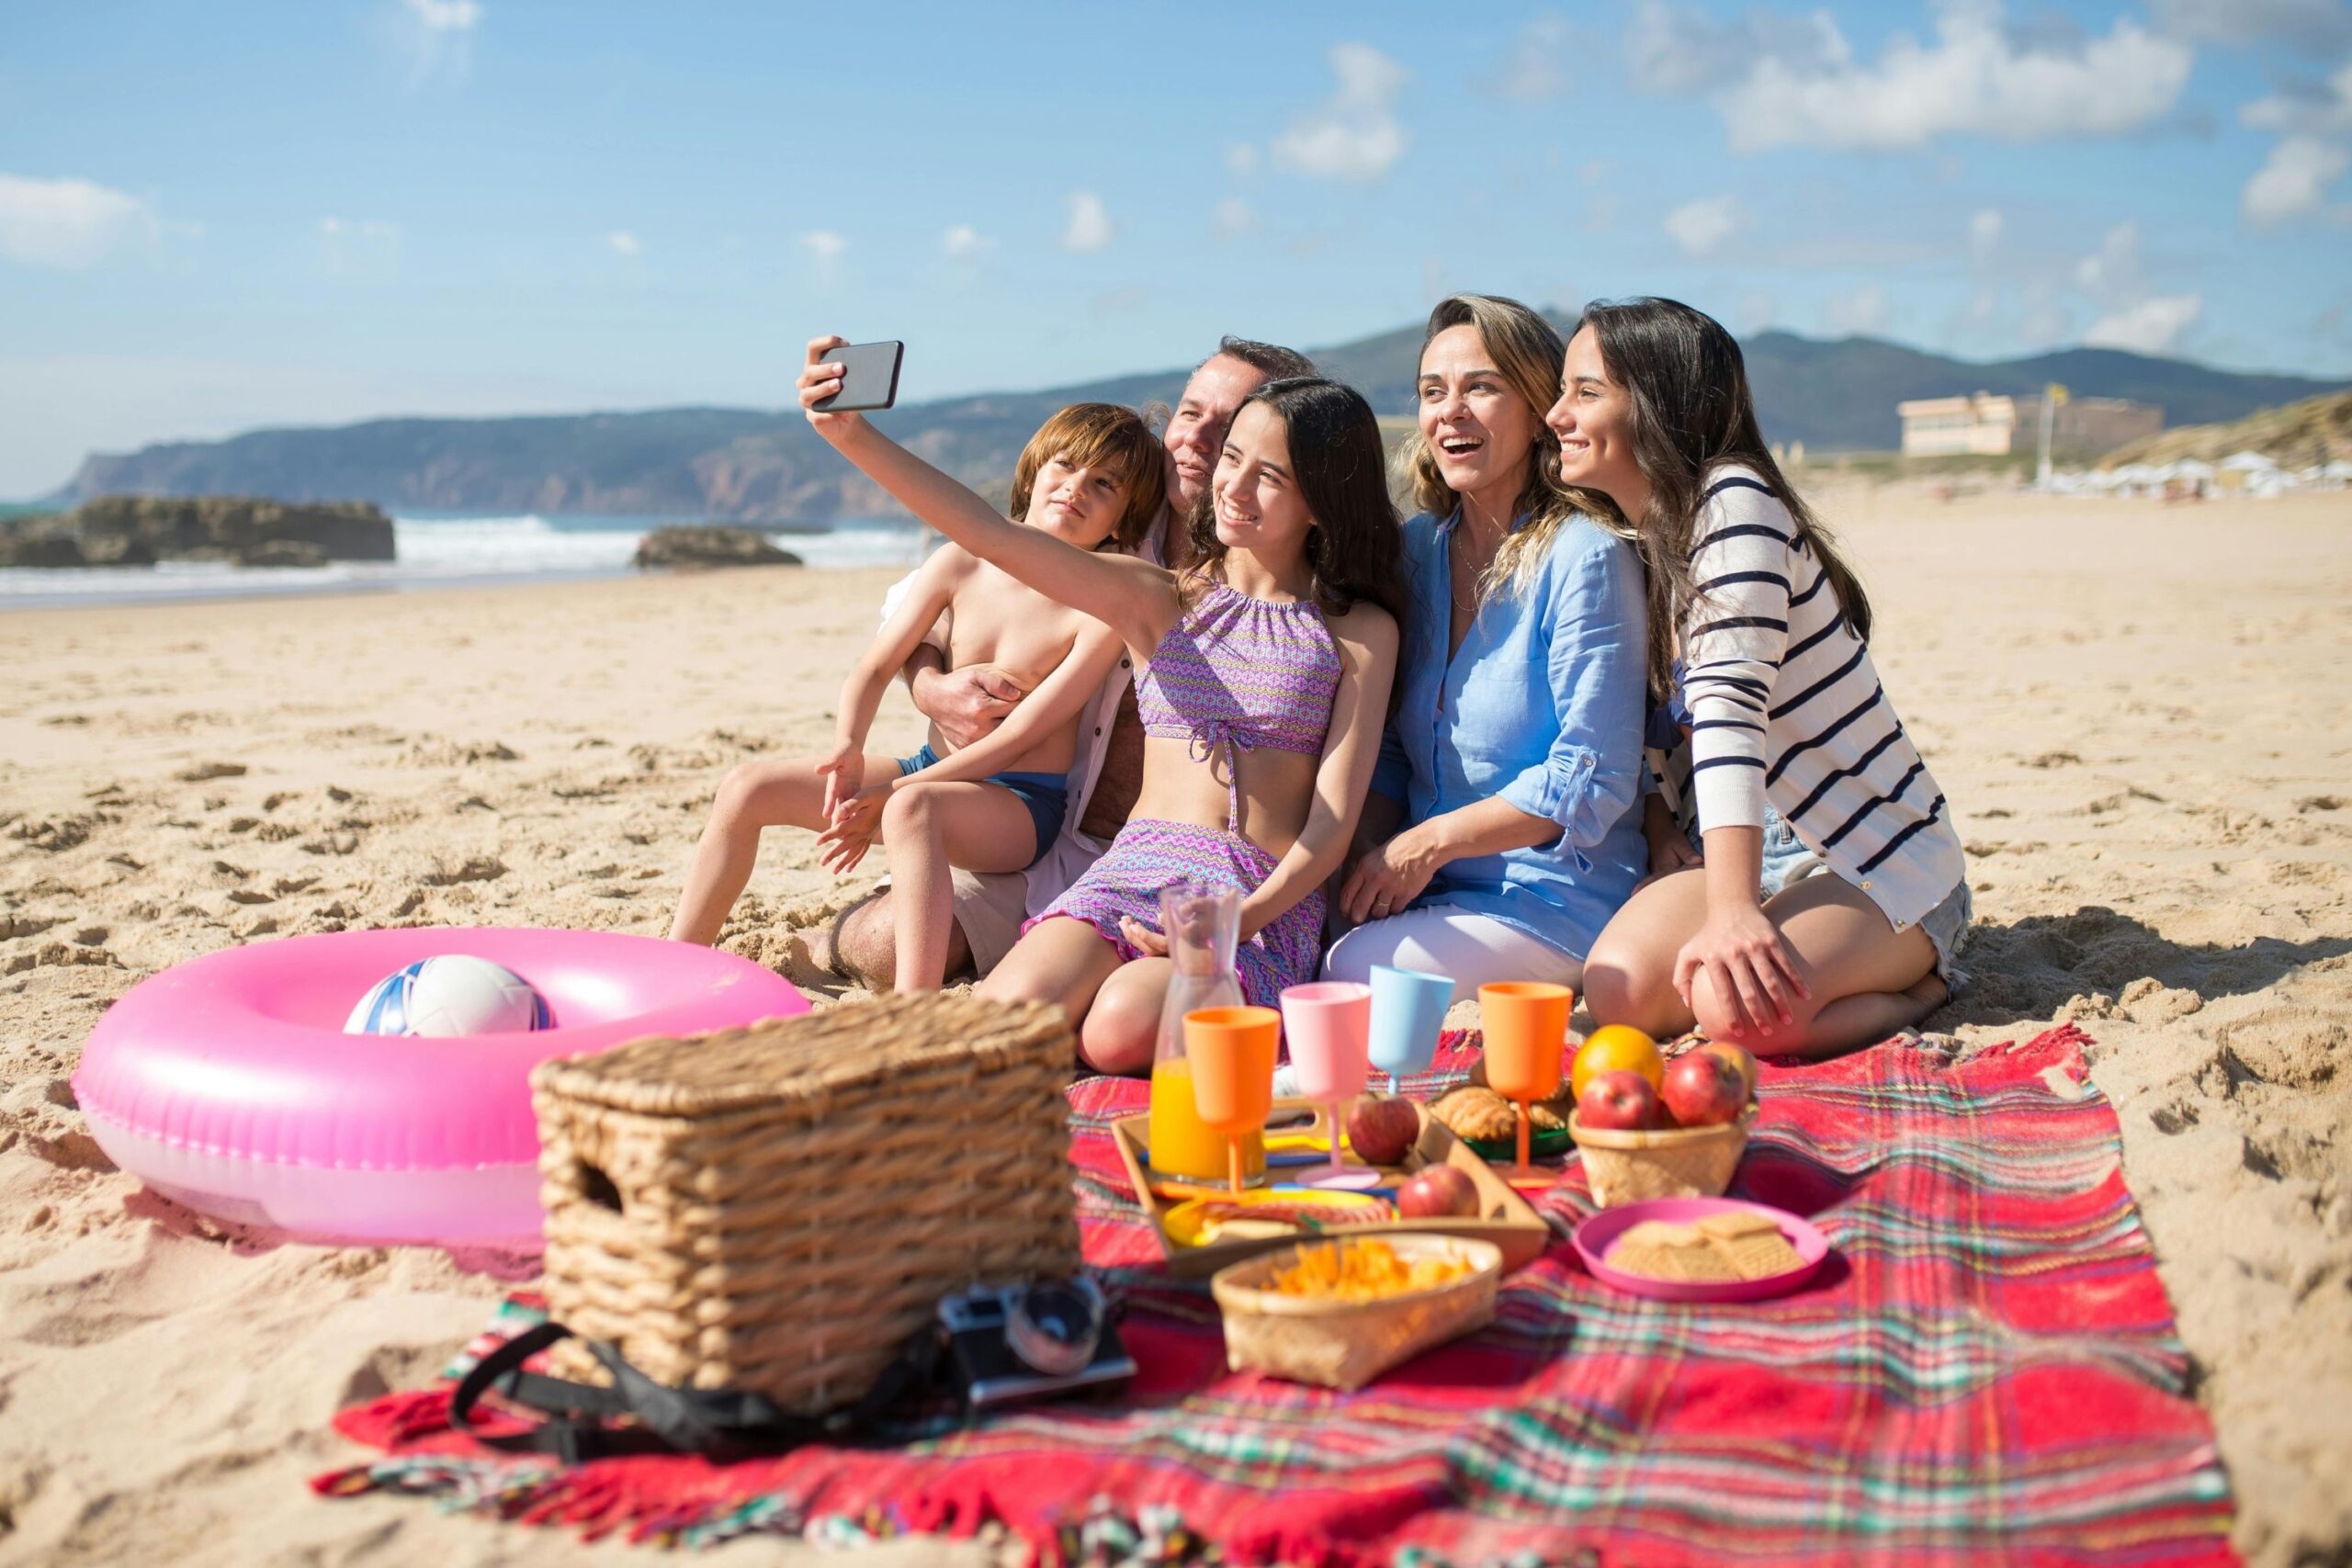
What’s the best location for a picnic photoshoot?
Look for open, grassy areas with a simple background, such as a park, beach, or quiet field. Avoid places with heavy foot traffic, distracting signage, or uneven ground.
How do I transport everything without ruining the setup?
Pack food in sealed containers and style it on-site. Roll up the blanket with lighter throws inside, and group props in one basket. Keep a dry cloth or towel handy for last-minute cleanup before shooting.
You May Also Like
How Do You Rent a Private Outdoor Space for a Picnic?

Best Beach Picnic Ideas for Every Season, Group, and Mood